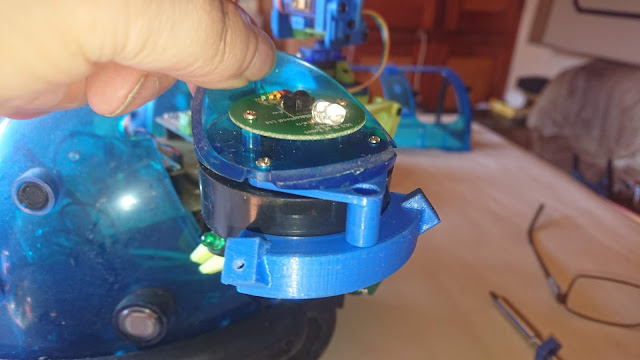
I have been asked to share what I did with the plastic tabs that hold the dome.
The original tabs are not the best design for this fixing, I have found with the blue transparent front halves of Cybot, these get broken off.
If they haven't snapped of completely yet, I reinforced them with plastic parts and epoxy glue.
(rough up the area where glue it to be)
(rough up the area where glue it to be)
There was two types I made, one for those still in one piece and one for those that have the tip where the screw goes broken. (the printed pieces may need trimming to fit good)
STL Files:
For those that have broken off completely.
I made a bracket that I screwed in place to support the dome.
This is made out of two parts screwed together.
STL Files:
Drilled some holes for the screws.
There are some other 3D printed parts I have made to improve things.
The rubber "O" ring around the bottom of the Line Sensor has probably perished by now.
I made a plastic one.
You will also see a plastic part I have fitted to the motors.
This piece lines up the motors (motor gear) more accurately.
Also there are the LED mounts.
If you don't want the long antenna, I made these.
Print, one as is and one mirrored.
STL File:
Another item was the front wheel, this was supposed to be easily removable so that it could be swopped out for the Cyball attachment.
The tabs on one of mine broke during this process.
I decided to make anew one for the Cybot I converted to Arduino.
While drawing Cybot I discovered that the front wheel was a little long in the stem.
It raises the front of Cybot, I don't know if it was done on purpose.
This is probably why Cybot dose not like to go in a straight line.
I have decided to make my new one so that Cybot sits level.
Some items will need purchasing for this:
1 x M3x10mm self tapping screw.
1 x M3x25mm set screw.
2 x 3mm(hole)x10mm(OD)x4mm(width) roller bearings.
The original wheel and spindle
STL Files:
A cut through section to show how it goes together.


Great !
ReplyDeleteThanks for leaving a comment, hope it what you need.
Delete